Use fresh, room‑temperature eggs and gently strain the whites through a fine‑mesh strainer so they stay compact. Fill a pot with four inches of water, bring it to a boil, then lower the heat to a gentle simmer around 180‑200 °F and add a pinch of salt. Create a steady swirl, slide the strained egg into the vortex’s center, and let it cook two to three minutes. Lift it with a slotted spoon, blot on paper towels, and serve immediately; the next steps will show you how to troubleshoot common issues.
Quick Guide
- Use the freshest eggs; their tight whites stay together without vinegar.
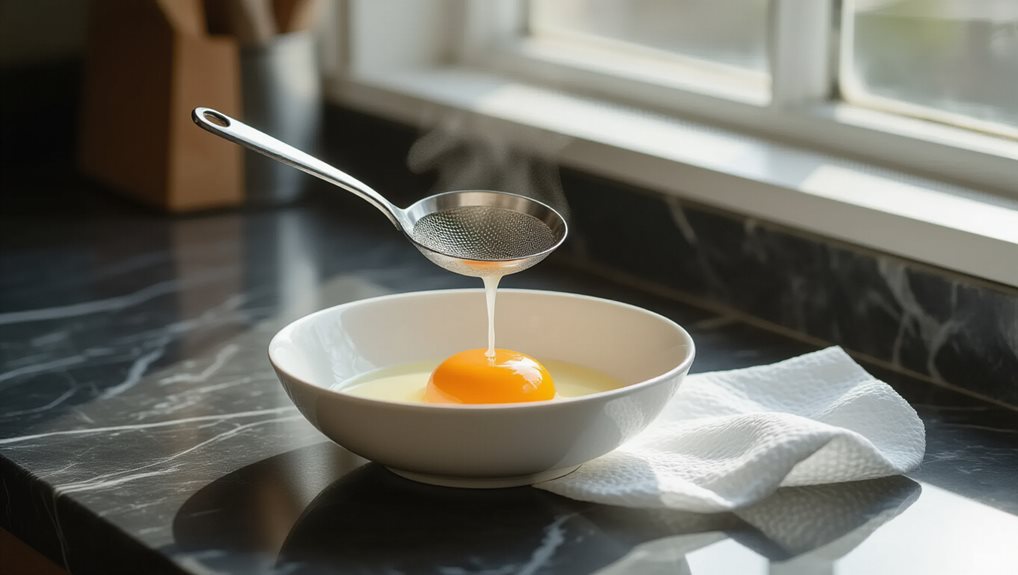
- Strain the egg through a fine‑mesh sieve into a ramekin to remove excess watery whites.
- Simmer water at a gentle 180‑200 °F (90‑93 °C) with a pinch of salt, maintaining small pin‑head bubbles.
- Create a firm vortex, slide the strained egg into the center, and cook 2‑3 minutes for a compact shape.
- Remove with a slotted spoon, blot on paper towels, and serve immediately to preserve texture.
Why You Can Poach Eggs Without Vinegar (And How)
Why can you poach eggs without vinegar? Fresh eggs have tight whites that stay together, so you don’t need acid to firm them. Use a mesh strainer to remove the thin, watery portion, then create a gentle vortex in sub‑simmer water. A pinch of salt helps the remaining whites set. The result is a compact, cohesive egg that holds its shape naturally. Use a sharp paring knife made from high-carbon stainless steel when cracking or tidying egg whites for cleaner edges and better control.
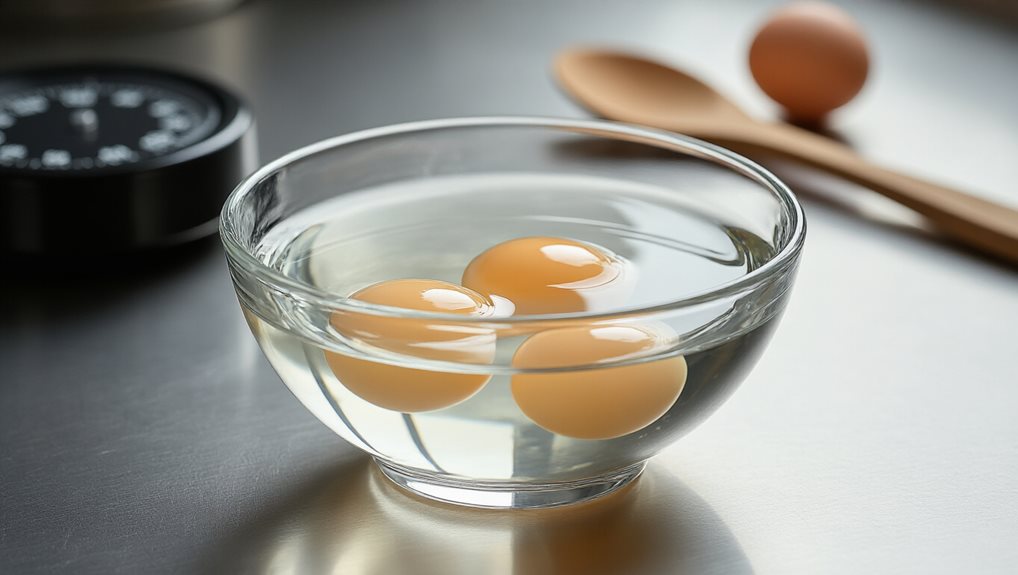
Test Poached‑Egg Freshness With the Float Method
Since you already know that fresh eggs stay together without vinegar, the next step is to verify that freshness before you poach. Fill a clear bowl with warm water, gently drop an egg, and watch its position. A fresh egg lies flat on the bottom; a partially aged one tilts, and a fully floating egg should be discarded. Like berries that last longer with refrigeration, colder storage helps keep ingredients fresher before cooking. This quick test ensures thick whites for perfect poached shapes. The float test works because the air pocket expands as the egg ages, changing its density.
Strain the Egg for a Compact, Tidy White
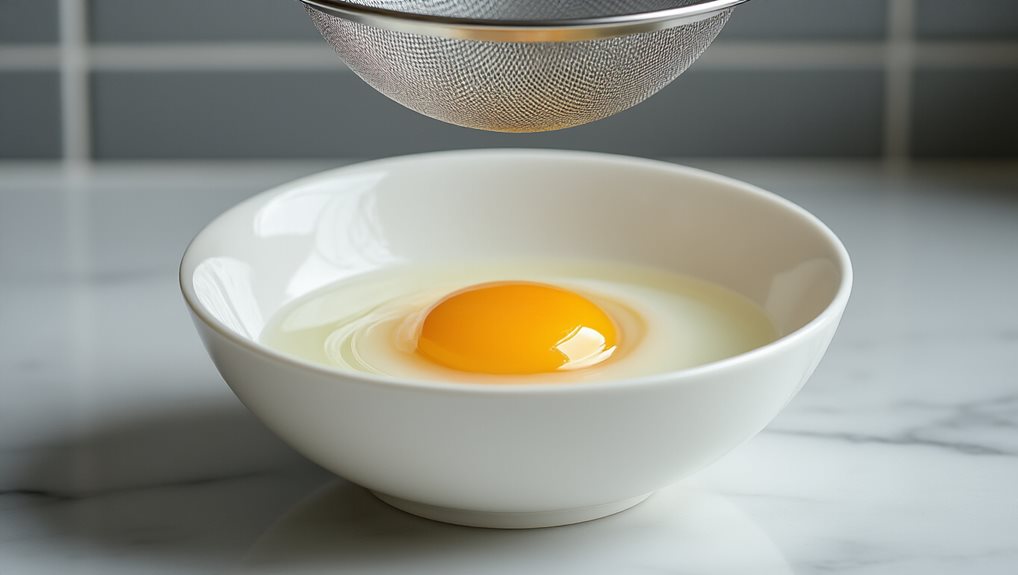
How can you keep the egg’s white tight and tidy before it hits the water? Place a fine‑mesh strainer over a small measuring cup, then crack the egg gently into the mesh. The loose, watery white drains through, leaving a compact mass with yolk intact. This setup prevents damage, removes wispy portions, and yields a neat, uniform egg ready for poaching. If you’re planning sides, remember eggplant seeds are edible and can be cooked to reduce bitterness.
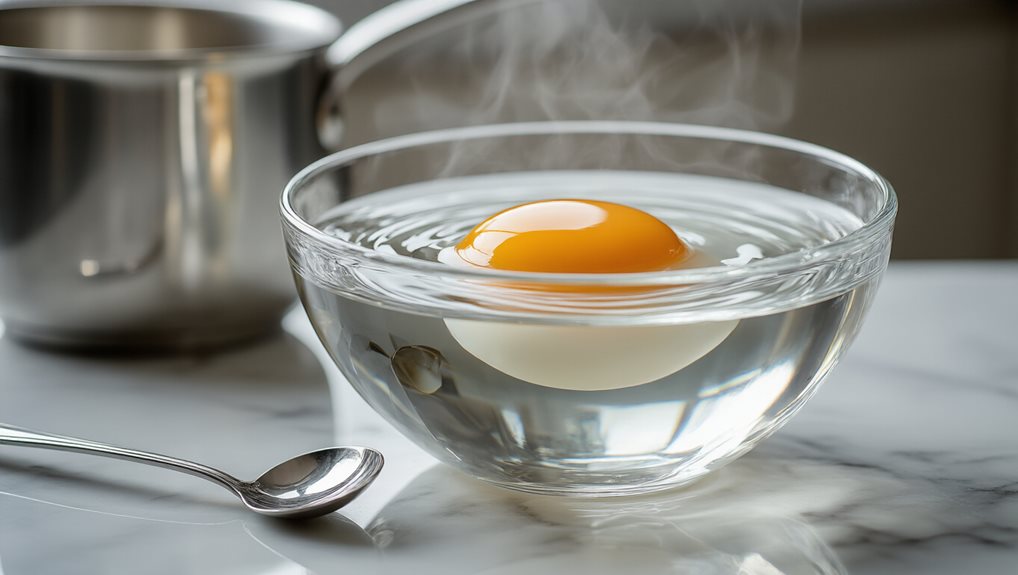
Prepare Water for Poached Eggs: Temperature, Salt, and Swirl
You’ll keep the water at a gentle simmer—about 200 °F—so the whites set without turning mushy, and you can add just a pinch of salt if you want a subtle flavor enhancement without over‑seasoning. To slow down bacterial growth, keep your eggs cold until the moment you crack them in.
After the heat drops to low, give the pot a quick, firm swirl with a wooden spoon to create a small vortex that will coax the egg white around the yolk.
This combination of temperature control, modest salt, and a brief whirlpool helps the poached egg stay tidy and evenly cooked.
Cold‑egg whites tighten, aiding separation and shaping.
Temperature Control for Ideal Poaching
When you heat the water, aim for a steady 200 °F (90 °C) simmer—small bubbles should rise from the bottom without breaking the surface.
Fill the pot about four inches deep, bring it to a full boil, then lower the heat until only pin‑head bubbles form.
Keep the surface quivering but not rippling, and slide the eggs in immediately for a quick set.
Salt Amount for Flavor Balance
Ever wondered whether a pinch of salt really matters when poaching eggs? A tiny pinch can help the whites set without altering flavor, but larger amounts—like a quarter cup—don’t improve buoyancy and just make the whites wispy. Because the cook time is short, salt barely seasons the egg. Most chefs skip extra salt, relying on vinegar for cohesion instead.
Swirl Technique to Center Egg
Why does a gentle vortex matter when you poach an egg?
You first bring a large pot to a boil, add salt, then lower the heat to a low simmer at 180‑190 °F. Stir vigorously to form a whirlpool, then slide the sieved egg from a ramekin into the vortex center. The swirling water wraps the white around the yolk, keeping it centered as it sinks. Cook three minutes, lift with a slotted spoon, and dry.
Make a Gentle Whirlpool to Shape the Egg
You’ll start by creating a gentle vortex in the sub‑simmer water, stirring just enough to form a smooth whirlpool without making the liquid churn violently.
Then, slide the strained egg into the center of the swirl, letting the gentle motion keep the whites wrapped tightly around the yolk.
Keep the motion steady and modest, so the egg holds its shape and the whites stay compact.
If you’re prepping breakfast ahead, remember that avoid refreezing after thawing is key to maintaining quality.
Vortex Whirlpoolinning Technique
When you create a gentle whirlpool in a simmering pot, the swirling water forms a natural cradle that keeps the egg white together as it cooks.
Fill the pot three‑quarters full, bring it to a boil, then lower to a simmer.
Stir the edges consistently to spin a steady vortex.
Slide the cracked egg into the center, avoid further stirring, and let it cook two to three minutes for a tidy, vinegar‑free poach.
Egg Center Placement
Ever wondered how a gentle whirlpool can keep your poached egg perfectly centered without any vinegar? Crack a fresh egg into a ramekin, strain any loose whites, then slide it into a simmering 180‑190°F water vortex.
The whirlpool’s steady motion and added salt buoyancy pull the whites inward, letting the yolk stay centered while the whites self‑assemble. Leave undisturbed for three minutes, then lift with a slotted spoon.
Gentle Motion Control
How can a gentle whirl keep the egg white wrapped neatly around the yolk?
Stir the near water with a wooden or dessert spoon in a 7 cm circle for ten seconds, forming a “V-shaped” vortex that lasts seven seconds after you stop.
Slide the strained egg into the vortex center, then let the whirl naturally slow for fifteen seconds, letting the whites coil tightly around the yolk.
Slide the Egg Into the Whirlpool and Time 2‑3 Minutes
If you’ve already created a steady V‑shaped whirlpool, slide the egg into the center quickly, using the teacup to guide it without letting the cup touch the water.
Drop the egg smoothly, then let the vortex wrap the whites around the yolk. Start timing now; keep the water at a gentle simmer for two to three minutes, checking firmness as it cooks.
Drain the Egg With a Slotted Spoon and Paper Towel
You’ll lift the poached egg with a slotted spoon, letting the water drain through the slots for about ten seconds while you keep the spoon steady.
Then you place the spoon on a stack of paper towels and press lightly so the towels soak up any remaining moisture without disturbing the egg’s shape.
This quick two‑step drain stops the cooking process and leaves a neat, dry egg ready for plating.
Slotted Spoon Technique
Ever wondered why a slotted spoon makes poached‑egg removal so clean? You gently slip it under the egg, preserving its shape and yolk. A single lift lets excess water drip for five seconds, then you tilt the spoon to guide the flow without pressing the egg. Tap lightly to check doneness, and repeat for each egg, skimming any loose whites between lifts.
Paper Towel Drainage
Usually, after you lift the poached egg with a slotted spoon, you’ll place the spoon on a folded paper towel to blot away excess moisture. Fold the towel double‑thick for stability, then gently shake the spoon over the towel, letting gravity drain water for five to ten seconds. Press the spoon briefly, lift, and repeat on a fresh section to remove residual surface water without squeezing, preserving the egg’s shape and texture.
Serve Immediately on Toast, Greens, or Your Favorite Base
When the poached egg is ready, place it straight onto the toasted base and the warm greens so the yolk stays runny and the flavors meld instantly. Spread hummus on the toast, add sautéed kale, then gently set the egg.
Sprinkle pepper, salt, and lemon juice, and garnish with herbs. Serve immediately while everything stays hot for suitable texture and nutrition.
Troubleshooting: Runny Whites, Over‑Cooking, and Splitting
Why do poached eggs sometimes end up with runny whites, over‑cooked yolks, or split shells? High heat makes whites disperse and yolks firm too fast, while a rolling boil bounces eggs, causing splits and stringy whites.
Fresh eggs lack tight whites, and too little salt slows coagulation.
Crowding raises temperature unevenly, and lingering in heat continues cooking after removal.
Use a gentle simmer, add salt, and give each egg space.
Tips for Consistently Perfect Poached Eggs Every Time
Ever wonder how to nail a flawless poached egg every single time?
Keep water at a gentle simmer, 180‑190°F, and add a pinch of salt after the boil settles.
Use the freshest eggs, room‑temperature, and strain any runny whites through a fine mesh into a ramekin.
Drop the egg into the simmering water, let it set briefly, then lift it with a slotted spoon.
This routine yields compact, tender poached eggs consistently.
Wrapping Up
By mastering the steps—testing freshness, straining, controlling temperature, creating a gentle whirl, and draining properly—you’ll achieve reliably smooth, compact poached eggs without vinegar. Consistent results come from paying attention to each detail, from water temperature to timing. Apply these techniques, and you’ll enjoy perfectly poached eggs on toast, salads, or any dish, every time.
