Let the chicken sit at room temperature for 10‑15 minutes, then brush it lightly with a neutral oil. For best crispness, preheat an air fryer to 375°F and cook the pieces 3‑4 minutes per side, flipping once, or use a preheated oven rack at 400°F for 10‑15 minutes, keeping the pieces spaced apart. Check that the internal temperature reaches 165°F, let it rest a few minutes, and you’ll get a juicy interior with a crunchy crust—more tips await if you keep going.
Quick Guide
- Preheat the oven to 350 °F, place chicken on a wire rack over a sheet, and bake 25–30 min, then raise to 400 °F for 5–10 min to crisp.
- Lightly brush each piece with neutral oil before reheating to restore a golden crust without excess greasiness.
- Use a digital thermometer; ensure the internal temperature reaches 165 °F before serving.
- Let the chicken rest on the rack for 5 minutes after reheating to allow steam to escape and keep the crust crisp.
- For quick reheating, use an air fryer at 375 °F for 3–4 minutes per side, flipping once and lightly spraying oil.
Select the Ideal Reheating Method for Fried Chicken
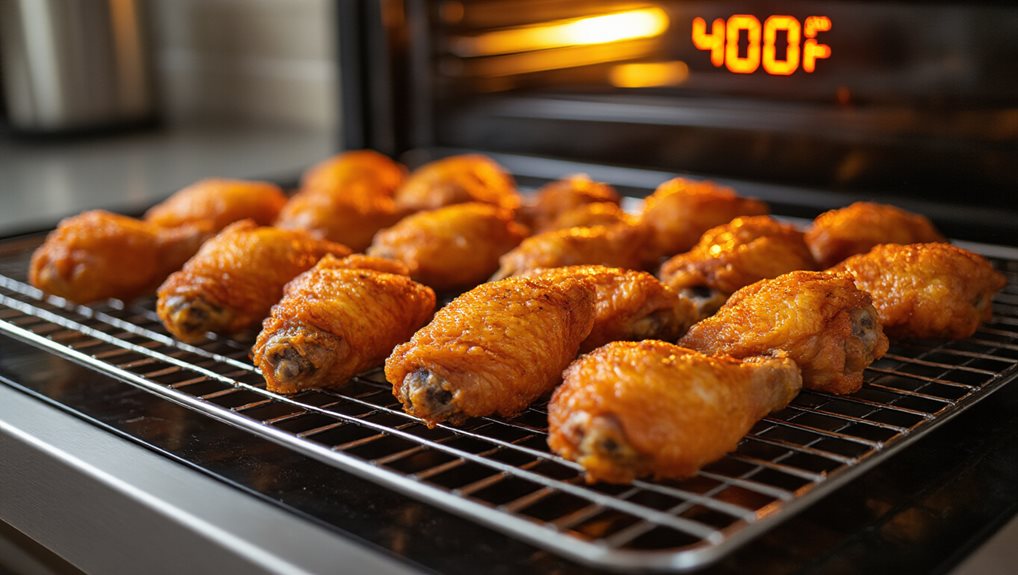
Which reheating method works best for your fried chicken? In the oven, preheat to 400°F, place a wire rack over a sheet, and bake 10‑15 minutes for even crisping; a 350°F start then 400°F finish works too.
The skillet uses 300°F oil, cooking each side 2‑3 minutes, then rests on a rack.
An air fryer preheats to 375°F, flips after 3‑4 minutes per side, and avoids sogginess. Store leftover chicken in airtight jars with BPA-free silicone gaskets to help prevent moisture from softening the crust.
Use a thermometer; hit 165°F.
Allow the chicken to sit for 10‑30 minutes before reheating to promote even heating.
Prep the Chicken – Room‑Temp Rest & Light Oil Boost
First, let the chicken rest on a wire rack until it’s no longer steaming—this cools it evenly and stops the crust from getting soggy.
Then, brush a thin layer of oil over the surface, making sure the coating is smooth and not clumped. Similar to how cooking eggplant seeds can reduce bitterness, using a light oil boost helps improve texture and flavor with cooked seeds.
The light oil restores crunch while the room‑temp rest keeps the meat juicy and ready for a quick, crisp reheating.
Resting the chicken also preserves internal moisture by allowing juices to redistribute throughout the meat.
Cool Chicken Before Reheating
If you let the fried chicken sit on a wire rack for a few minutes after cooking, excess fat drips off and the surface dries just enough to keep the coating from turning soggy later.
Then let it rest at room temperature for 10‑30 minutes; this equalizes temperature, prevents condensation, and keeps the meat moist while the crust stays dry.
Use a rack and paper towels to absorb juices, ensuring even reheating without sogginess.
Light Oil Application
How can you enhance crispness without drowning the chicken in grease? First, let the pieces sit 10‑30 minutes so they reach room temperature; this promotes even heating and prevents the exterior from overcooking.
Then, drizzle a thin layer of neutral oil—about 3/8 inch—into a pre‑heated 300°F skillet.
Shallow‑fry each side two to three minutes, drain on a wire rack, and you’ll restore a golden, crisp crust while keeping grease minimal.
Even Layer Placement
After letting the chicken rest at room temperature, arrange the pieces in a single layer on a wire rack set over a baking sheet, keeping about a half‑inch gap between each.
This spacing lets hot air circulate, preventing steam from pooling.
Stagger the pieces for optimal heat flow and position the rack in the oven’s center.
The result is even crisping without soggy spots.
Air‑Fry to Reheat Fried Chicken – 375°F, 3‑4 min per Side
Why settle for soggy leftovers when you can revive fried chicken’s crunch in minutes?
Preheat your air fryer to 375°F, then arrange pieces in a single layer without overlap. Lightly spray the basket and the chicken with oil, then cook 3‑4 minutes per side, flipping halfway. Check that the interior reaches 165°F before serving immediately for maximum crispness. If you’re sipping a sports drink alongside leftovers, remember an opened bottle stays fresh for 3–5 days when refrigerated and tightly sealed.
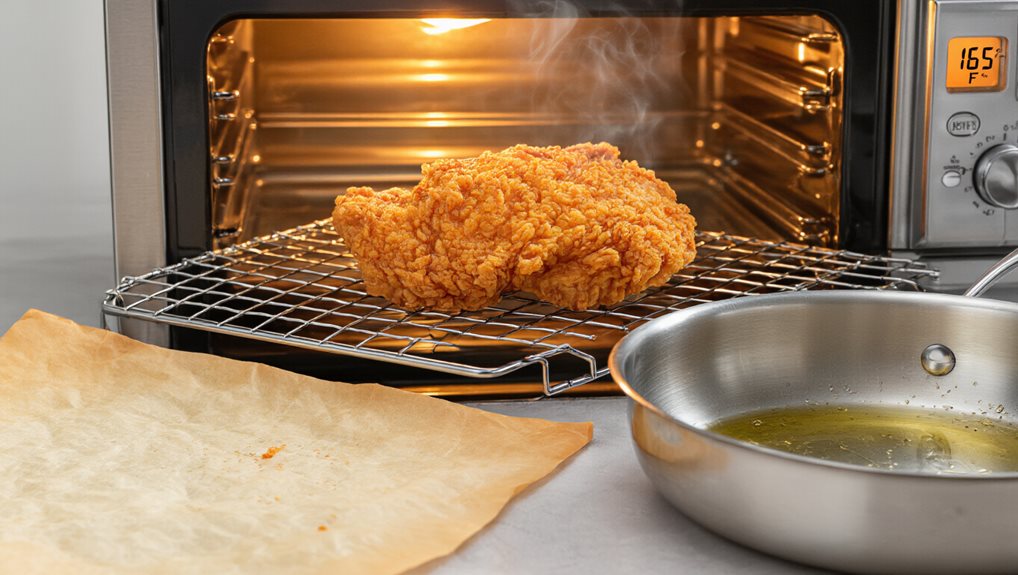
Oven‑Rack Method to Reheat Fried Chicken – 400°F, 10‑15 min
If the air‑fryer gave you a quick crunch, the oven‑rack method can handle larger batches while still delivering that crispy bite. Preheat to 350°F, place a wire rack on a dark cookie sheet, and space pieces a few inches apart. After 25‑30 minutes, raise the oven to 400°F and cook 10‑15 minutes until the skin crisps and the interior reaches 165°F. Let the chicken rest briefly before serving. If you’re serving it with Alfredo, keep the sauce smooth by reheating it gently over medium‑low heat to protect its delicate emulsion.
Cast‑Iron Skillet to Reheat Fried Chicken – 300°F, 2‑3 min per Side
You’ll start by preheating your cast‑iron pan until the oil reaches a steady 300°F, then add the chicken in a single, non‑overlapping layer.
Keep the oil even and flip the pieces quickly after 2‑3 minutes, making sure each side gets the same short burst of heat.
Finally, check that the temperature stays constant and the chicken is fully heated before you transfer it to a rack for draining. Just like you’d keep pantry staples in an airtight container to protect them from moisture, avoid letting steam build up around the chicken so the crust stays crisp.
Preheat Cast‑Iron Pan
A 12‑inch cast‑iron skillet should be placed over medium‑high heat and lightly coated with a tablespoon of neutral oil, such as canola or peanut, before you start reheating the chicken.
Heat the skillet until the oil shimmers, about three to five minutes, indicating it has reached roughly 300°F.
This assures an even, hot surface that will crisp the chicken skin quickly.
Maintain Even Oil Layer
After the skillet is heated to a steady 300°F, pour a shallow layer of neutral oil—just enough to coat the bottom. Choose a light vegetable oil; it spreads evenly and stays at the right temperature. This thin film prevents sogginess and mimics the original fry, keeping heat consistent across the surface.
Maintaining the oil layer ensures the breading crisps uniformly without excess greasiness.
Flip Quickly, Check Temperature
Why wait for the chicken to overcook on one side when a quick flip keeps the crust even and the interior juicy? Flip after 2‑3 minutes per side in the 300°F cast‑iron skillet, then check the core with a thermometer.
Aim for 165°F internal; this guarantees safety without drying the exterior, providing evenly crisp, juicy bites.
Microwave Quick‑Fix to Reheat Fried Chicken – 90% Power, 30‑Sec Flips
Ever wondered how to revive fried chicken in the microwave without turning it into a soggy mess? Use 90 % power and heat in 30‑second bursts, flipping each time. Place a plain paper towel under each piece to soak up excess moisture. Check the coating after every cycle, and stop before the meat dries out. This quick method keeps the skin relatively crisp while warming the interior.
Safety & Crunch: 165°F Final Check
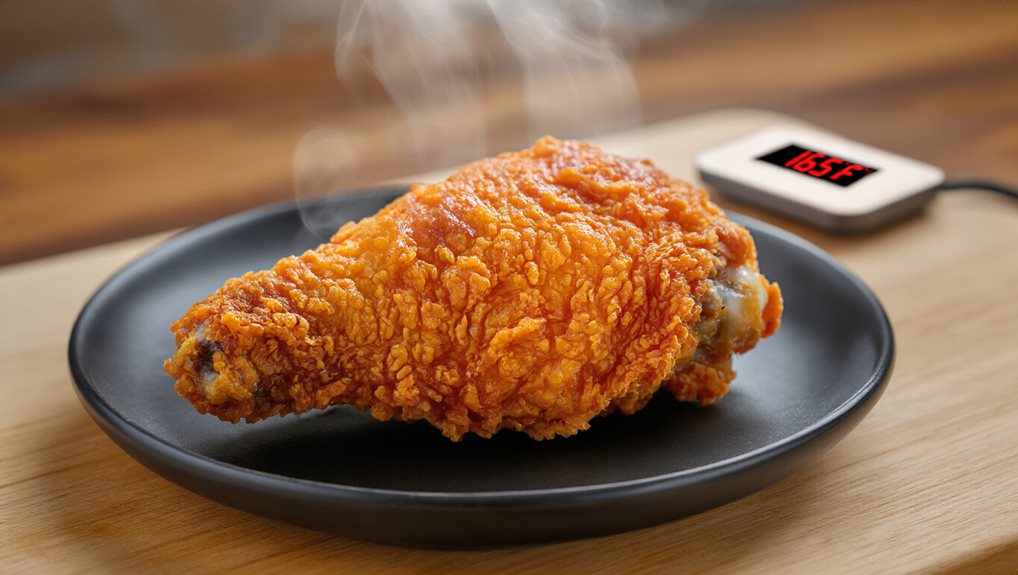
How do you know your fried chicken is both safe and still crunchy? Insert a digital thermometer into the thickest piece; you should see 165°F.
Preheat the oven to at least 325°F, preferably 400°F, and use a wire rack for even heat.
Check the temperature after 10‑15 minutes, then let the chicken rest on a rack for five minutes before serving.
Wrapping Up
Pick the method that fits your schedule and tools, then follow the steps to bring the chicken back to 165 °F. Air‑frying or using the oven rack gives the best crunch, while a skillet adds a quick, even finish. Even the microwave can work if you’re short on time, just finish with a brief high‑heat blast. By letting the chicken rest briefly before reheating and checking the internal temperature, you’ll enjoy crispy, safe leftovers every time.

